Getting Started
🚀 Quickstart with CLI
In this section we'll get you up and running with @tanglemedia pacakges using the create tanglemedia-app CLI which will automatically setup a sveltekit project using the @tanglemedia UI, and all the configurations necessary to run it.
Quickstart installation
The following command will scaffold a new SvelteKit application and add all the @tanglemedia packages boilerplate for you.
By doing this command you will be prompt by the following questions in your terminal about the project you want to create.
Where should we install your project (Enter for current directory)?
On this prompt you need to select a empty directory, if you are already in one you can just type . else you can type the route for where you want the project to be, for example: ./my-tangle-project
What other packages would you like to install
On this prompt you will be able to select some extra packages that could be very usefull in your project, we recommend accepting all the options, but you have a choice to pick and choose specific ones for your project if you know exaclty what your project will need.
What should the title of the app be (default is Tangle Media App)?
On this prompt you will be able to type the title of your project / app, that value will be stored in a title variable that will be read in some of the configuration yml files, which show the name you pass in on the dashboard tab, on the copywright footer, and other SEO fields.
Don't worry if don't know exaclty the name of the app/project at the start, you can type just a place name for starters, then later in the project, once you have the final name, you just need to change the value of title on your app.yml in your /config folder.
What should the primary colour of the project be (default is #37352F)?
On this prompt you will be able to set the primary colour of your project, this colour will be displayed in areas like: sidebar and navbar. It will also be accessible in css classes with the name of "primary" like: "bg-primary", "text-primary", as well as it will create a tailwind css color scheme with that color.
This will hit a api endpoint(https://www.tints.dev/api?primary=${primaryColor}&accent=${accentColor}) and create a theme.ts file on your /boot folder, that will have your custom tailwind css color scheme theme.
The actuall value will be stored in primary_color on your app.yml in your /config folder.
What should the accent colour of the project be (default is #F1F1EF)?
On this prompt you will be able to set the accent colour of your project, this colour will be displayed in areas like: sidebar and navbar. It will also be accessible in css classes with the name of "accent" like: "bg-accent", "text-accent", as well as it will create a tailwind css color scheme with that color.
This will hit a api endpoint(https://www.tints.dev/api?primary=${primaryColor}&accent=${accentColor}) and create a theme.ts file on your /boot folder, that will have your custom tailwind css color scheme theme.
The actuall value will be stored in accent_color on your app.yml in your /config folder.
Which auth layout mode to use?
On this prompt you get two options, 2 Columns or 1 Column, you have to choose one of them.
This will be automatically configure how your auth layout will be displayed on the unauthorized routes.
The actuall value will be stored in ui.layout.mode on your auth.yml in your /config folder.
Which dashboard layout the project would be used in more often?
On this prompt you get two options, Desktop or Mobile, you have to choose one of them.
Some people get confised on this option because they think that if you choose Desktop then you app will be only for Desktop and if a user access on its phone it won't work, or the layout will be awful, and the same for if the user selects Mobile as the layout mode. Don't worry!🧘♂️, the layout mode just sets a layout that you want your app to be more optimized for.
What that means is: if you know your app is going to be more used on the phone or tablet, and you want a "APP" feel to it, you could choose the Mobile layout mode for it, since that will display a footer navbar with the screen is the size of a tablet or smaller, but it will still show the default sidebar if bigger (on a desktop).
The same is if you knoe your app is going to be more used on a desktop, you could choose the Desktop layout mode for it, since that will display a sidebar menu for screen bigger than a phone, and for phone screen it will display a hamburger menu with a drawer component.
The actuall value will be stored in display.mode on your layout.yml in your /config folder.
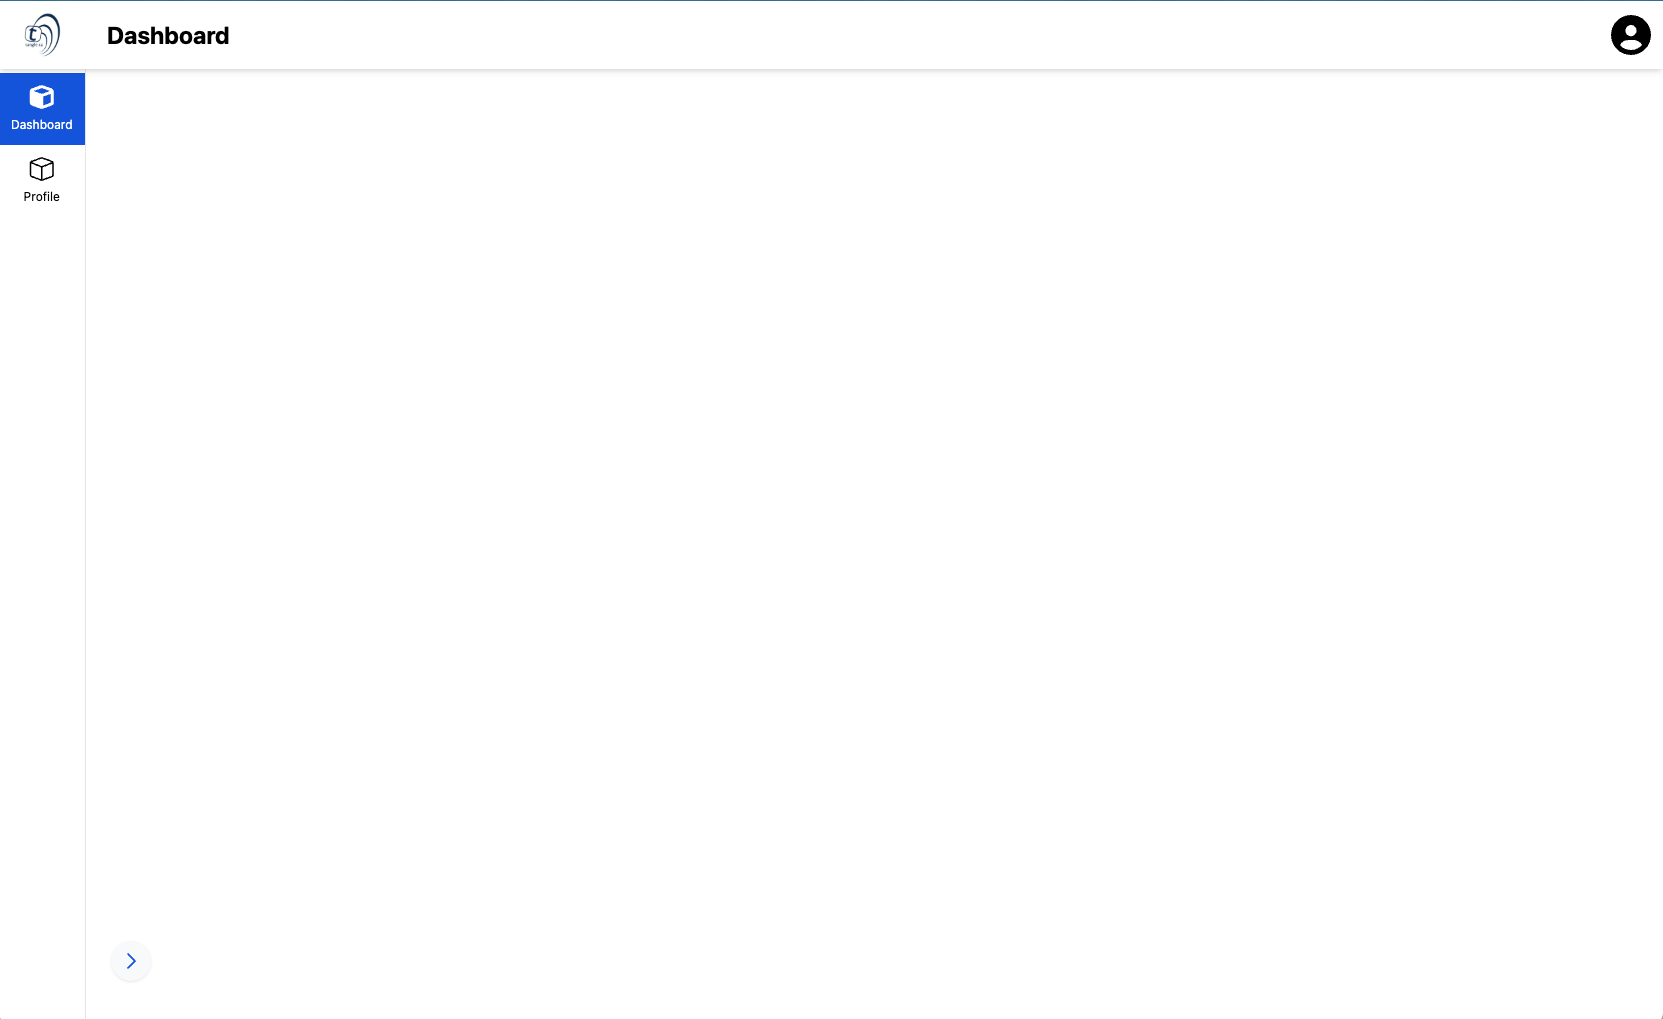
Would you like to display a sidebar?
On this prompt you get two options, Yes or No, you have to choose one of them.
If you choose yes it will add the slot and configuration to your layout to have a sidebar menu.
The actuall value will be stored in display.navigation on your layout.yml and on the sidebar.yml in your /config folder.
Example:
Which sidebar type to use?
On this prompt you get two options, Default, Minimal, or Detailed, you have to choose one of them.
These are all the different types of sidebars we have:
- Default is a simple sidebar where for each item, the icon is displayed on top of the title and the buttons are in a square shape.
- Minimal is a very simple sidebar where for each item, it only shows the icon, and when you hover over the item it displays the title in a tooltip element.
- Detailed is a bigger sidebar where for each item, it displays the icon and title in a horizontal display.
The actuall value will be stored in components.main.style on your sidebar.yml in your /config folder.
Which sidebar position to use?
On this prompt you get two options, left or right, you have to choose one of them, this is responsible for displaying the sidebar on each side of the screen.
The actuall value will be stored in components.main.position on your sidebar.yml in your /config folder.
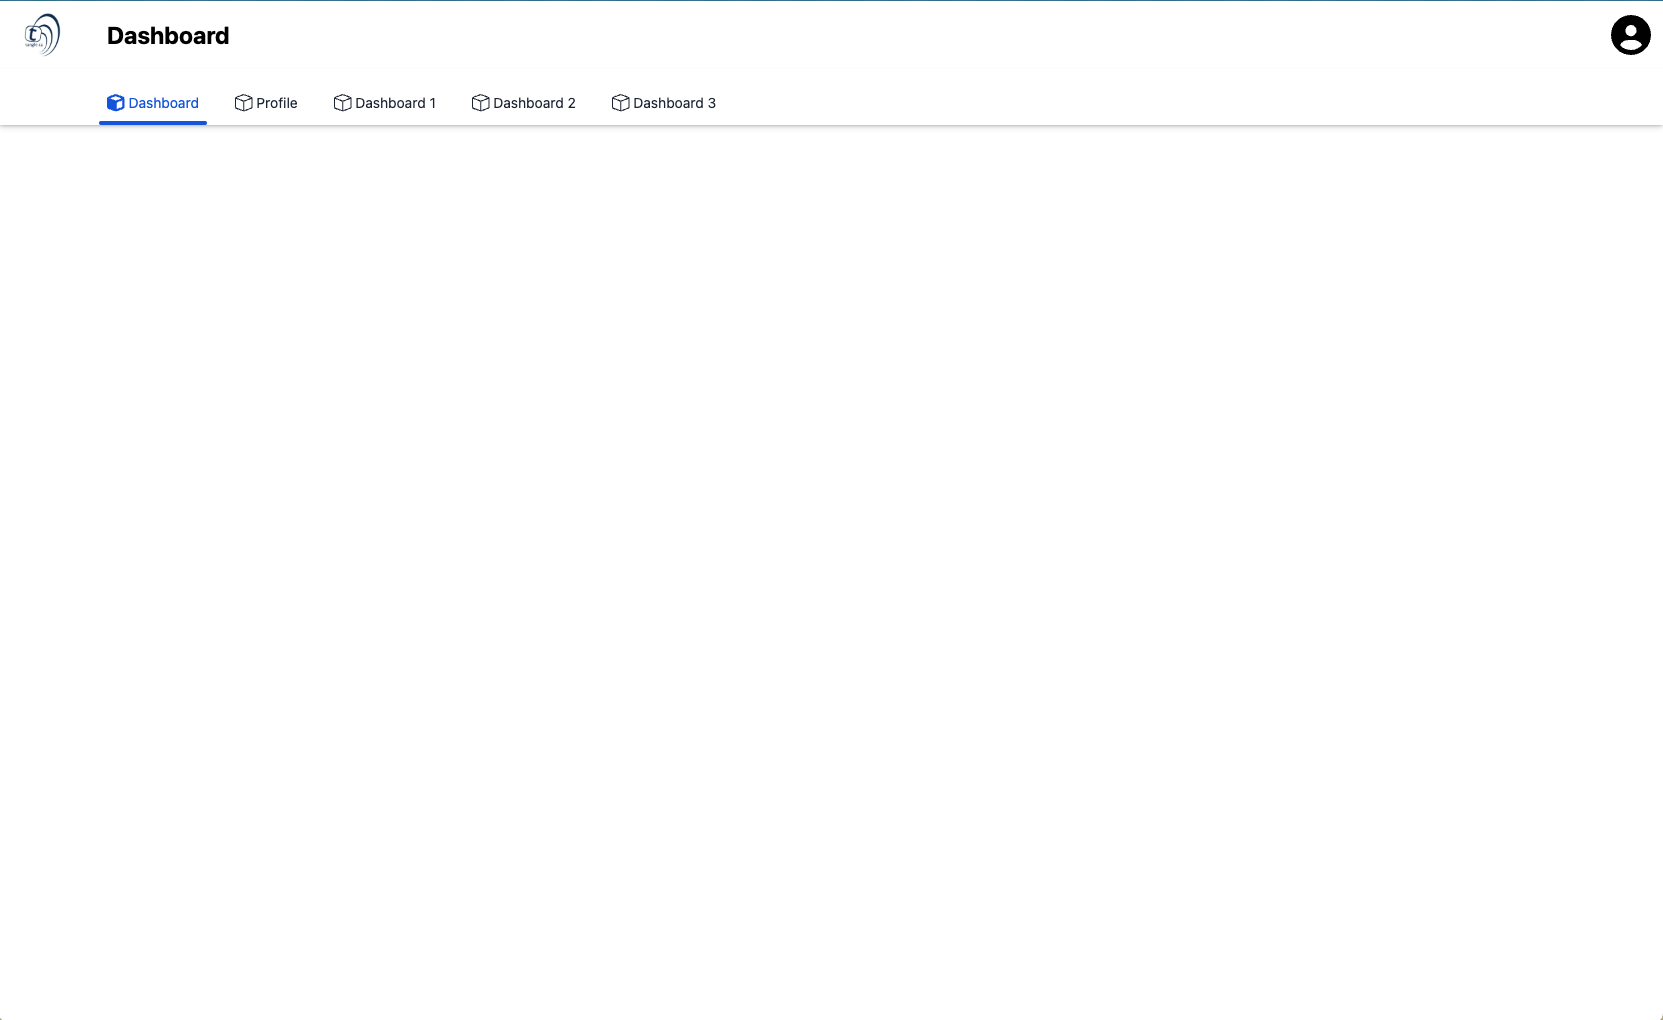
Would you like to display a top header navigation?
On this prompt you get two options, Yes or No, you have to choose one of them.
If you choose yes it will add the slot and configuration to your layout to have a top header navigation menu.
The actuall value will be stored in display.navigation on your layout.yml and on the header.yml in your /config folder.
Example:
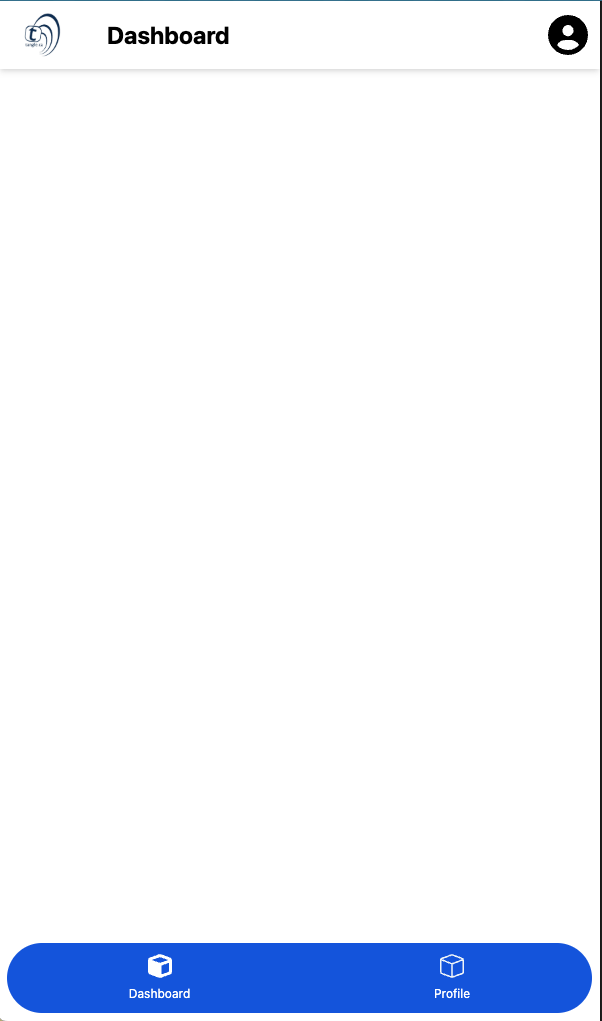
Would you like to display a bottom navigation?
On this prompt you get two options, Yes or No, you have to choose one of them.
If you choose yes it will add the slot and configuration to your layout to have a footer menu.
The actuall value will be stored in layout.footer.enabled on your layout.yml and on the footer.yml in your /config folder.
Example:
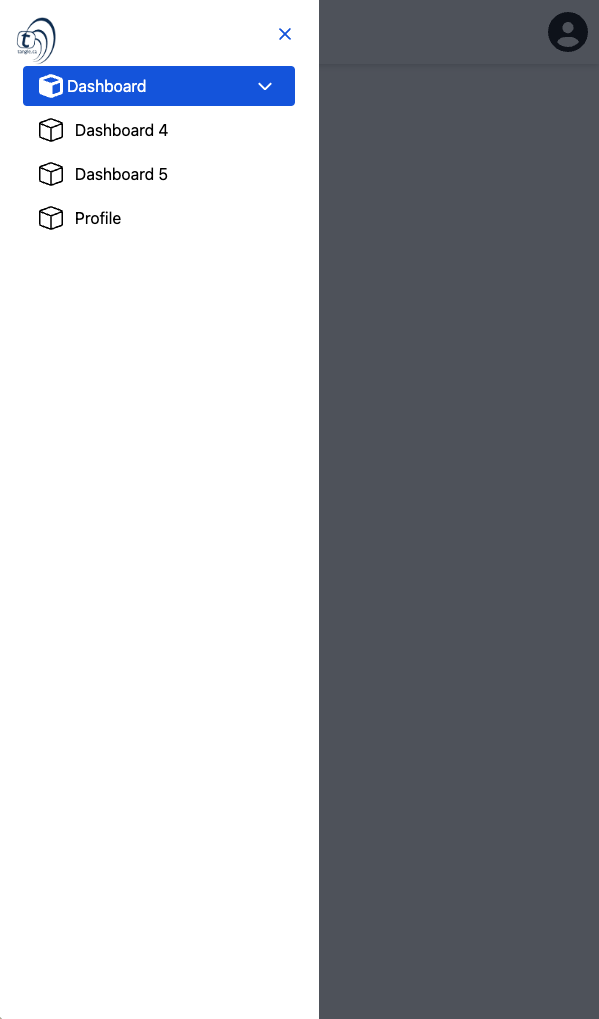
Would you like to display a hamburger menu?
On this prompt you get two options, Yes or No, you have to choose one of them.
If you choose yes it will add the slot and configuration to your layout to have a hamburger/drawer menu.
The actuall value will be stored in navigation.mobile.hamburger.display on your header.yml in your /config folder.
Example:
What type of API is going to be used?
On this prompt you get two options, Basic, Directus, or Fetch, you have to choose one of them.
Whould you like to add MarkerIO to your project?
On this prompt you get to choose if you want to add MarkerIO to your project, if you do, you have to select the checkbox
We recommend you accepting to have Marker IO, even if you don't know if you will use it or not, if at the end of the day you don't, you can just remove the script from the base +layout.svelte
What is the project ID for MarkerIO?
If you selected Yes to marker IO, then you will get this prompt, which is for you to add your Marker IO project ID, that you can get on the marker IO dashboard when you create a new project.
If you selected No to marker IO, you won't get this prompt.
Final Step
Once you are done with all of those steps, you will need to install and initialize your application, but before you do the necessary commands, you need to make sure to add the FONTAWESOME_TOKEN env variable to the project, OR remove the pro fontawesome packages. After doing that you should be able to just run these commands and the application will run:
Conclussion
Congratulations, you did it 🎉! you finished all of the settings and layouts that you needed to do to start your first Sveltekit app using the @tanglemedia UI 🚀🔥.
Now what you can do is start adding your main routes to your /(app) folder group, like per example, a folder called “dashboard” that could be the first page that your user goes to after it logs in…
Make sure to check out all of the libraries that you could use in the project on npm by just searching for @tanglemedia.
Happy coding! 🤟